Password protect folders and directories
What is directory privacy?
All of our cPanel customers can use the directory privacy utility. This feature is built into cPanel software and allows you to password-protect directories when accessed via a URL. You might have a few reasons for wanting to do this, if you’re running a WordPress you could use this feature to lock access to your /wp-admin page or any page on your site.
This provides another layer of authentication and gives you a little more peace of mind. Password-protecting a directory also means that you can restrict sensitive information to yourself or other “higher level” users.
Why password-protect folders?
When you password-protect files or password-protect a folder, you protect a folder or the files contained within. Impeding any criminal activity relating to lost or stolen files.
It is sometimes unnecessary to password-protect entire folders. For instance, some information contained within may be less restricted. In this case, it would be better to password-protect individual files, this would ensure only the select file would require a password.
Password protection in cPanel
1. Firstly, login to cPanel account.
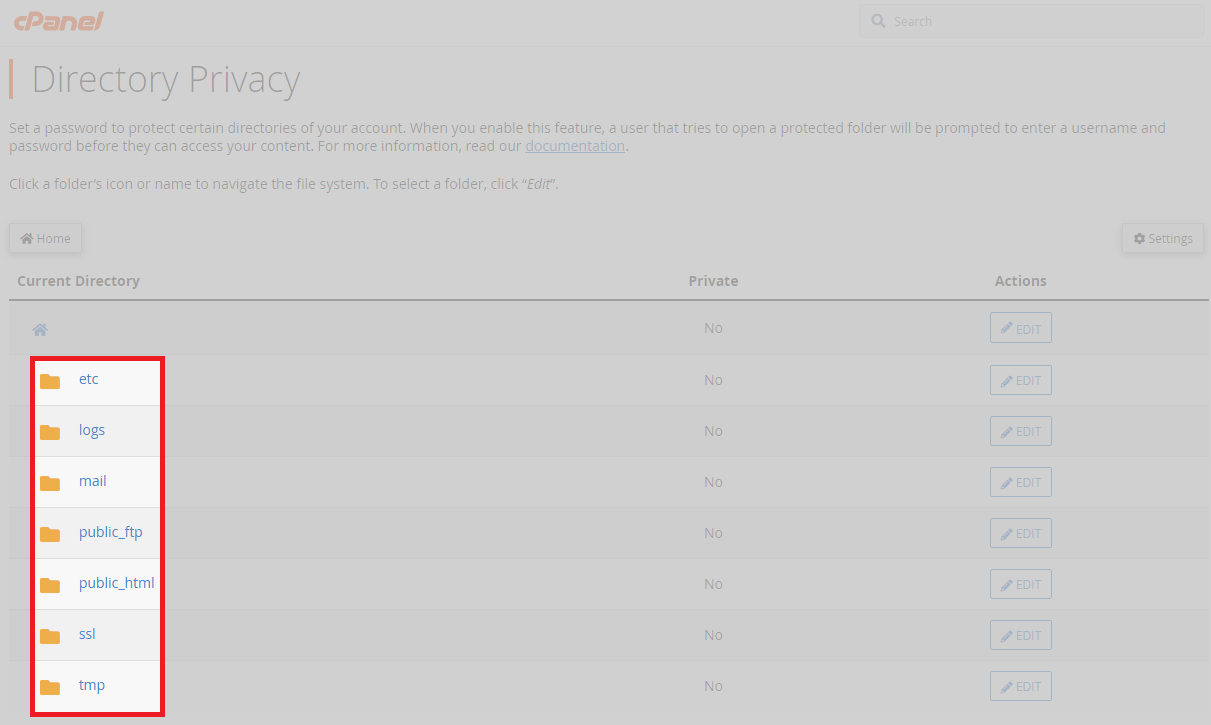
2. After, head to the file section and click on directory privacy.

3. Once, you enter the directory privacy area, you can enter individual directories (folders) by clicking on them, you will also notice the files.

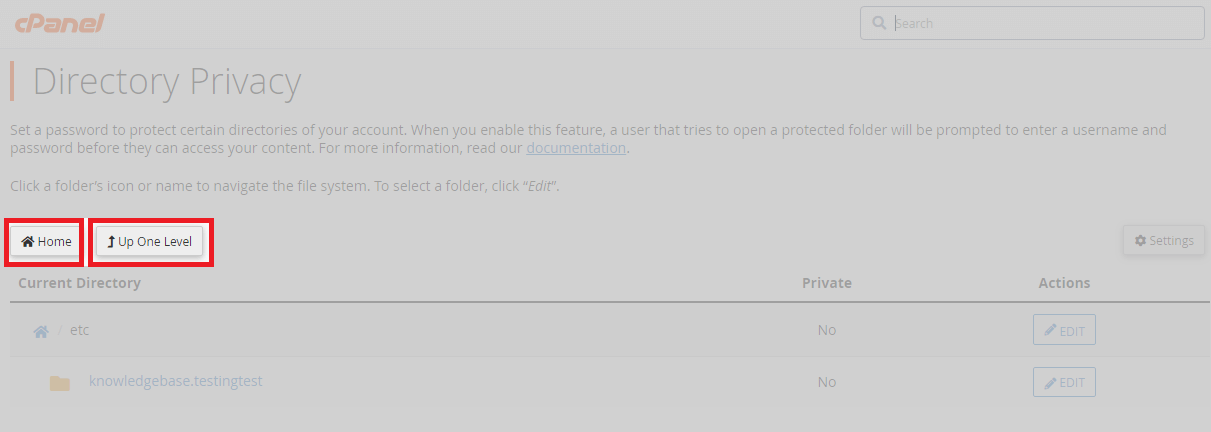
4. Now, to get around the tool easier, you can use either the home or up one-level buttons. These let you easily navigate through all the files.

5. Afterwards, to begin editing a directory, click the edit button on the right to select its properties.
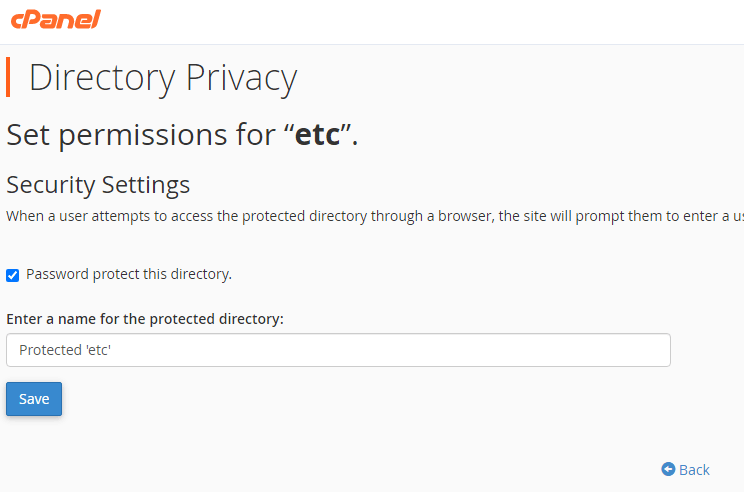
6. Once, you have begun editing a directory, click the checkbox labelled password protect this directory.

7. Enter a name for the protected directory. From here, you can enter a name for the protected directory (folder).
8. Finally, click save to apply all the changes to the directory.
Adding a user to the directory (folder).
1. Firstly, after completing the above setup, click on the go-back button.
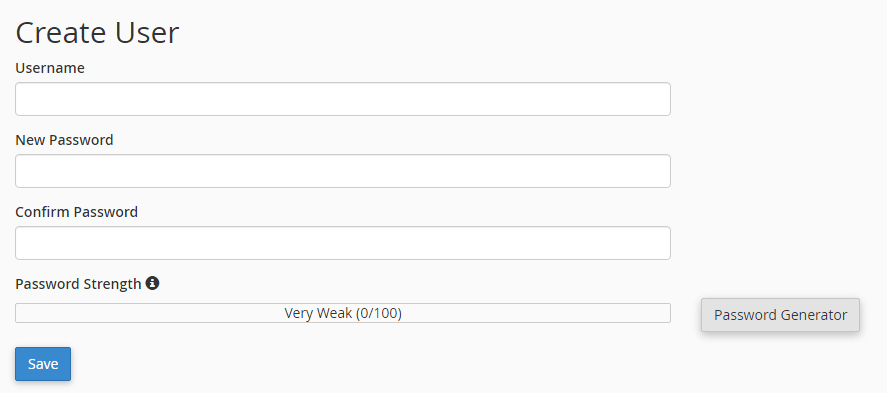
2. From here, you can create a user with access to the now-secured directory or folder.

3. Afterwards, create a username and use the password generator to make a unique passphrase.
4. Finally, click save. If the contents are secured, then a lock will appear on the folder and yes in the private column.

