How to Manage Nginx Cache
This guide explains how to manage the Nginx reverse proxy cache for your website within a cPanel environment. This process is applicable to any hosting provider that uses cPanel with Nginx enabled.
What is Nginx Reverse Proxy Cache?
Nginx is a powerful web server that is often used as a reverse proxy. In this role, it sits in front of your primary web server (like Apache) and handles incoming requests. The cache feature stores a temporary copy of your website’s content. When a visitor accesses your site, Nginx can serve the cached version directly, which is much faster than having to process the request through the primary server. This significantly improves your site’s performance and reduces server load.
Enable NGINX Cache in cPanel
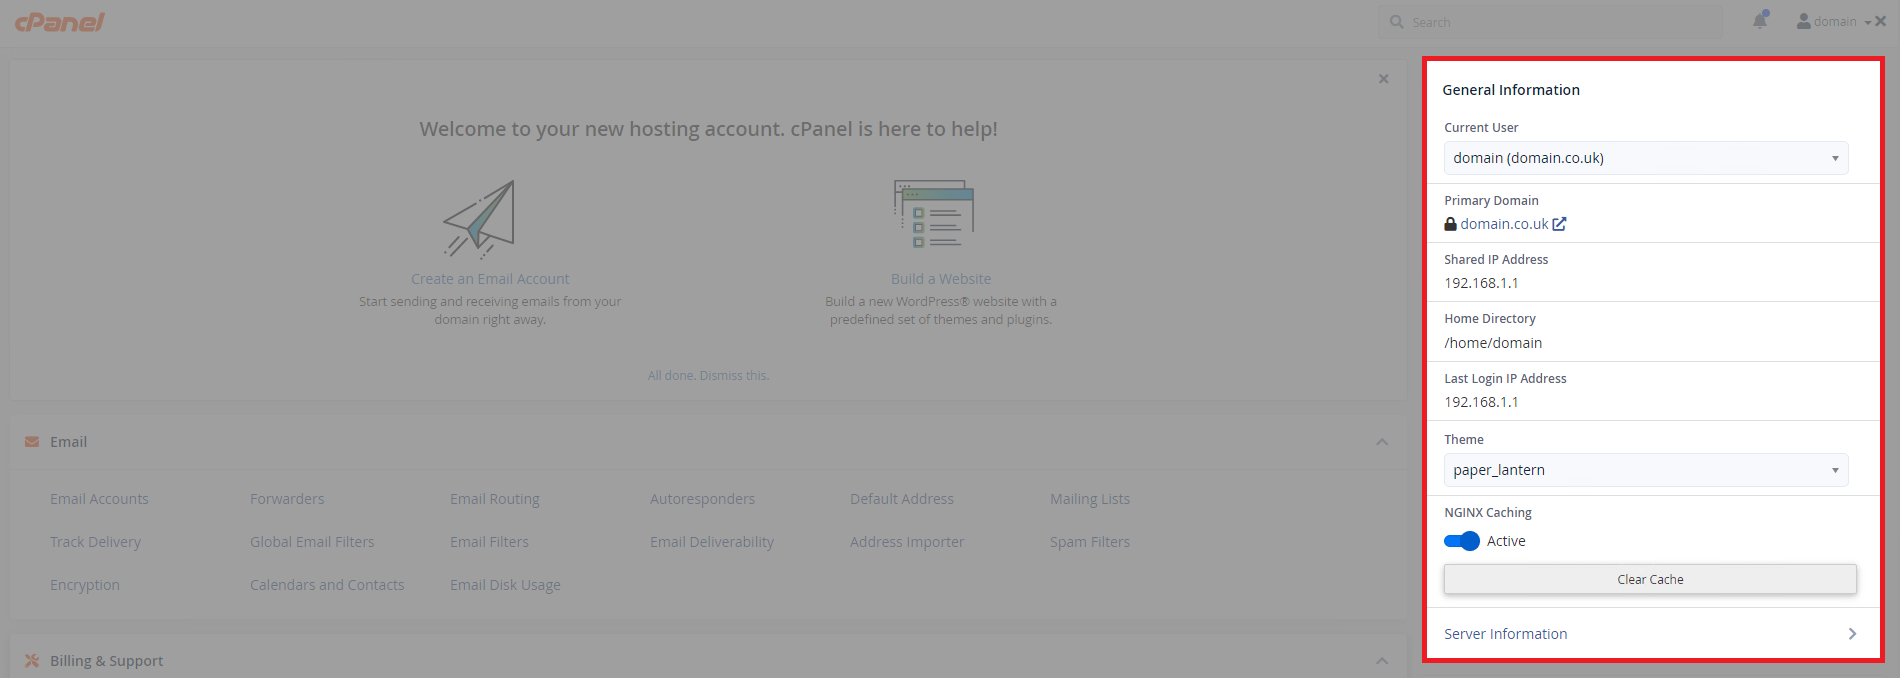
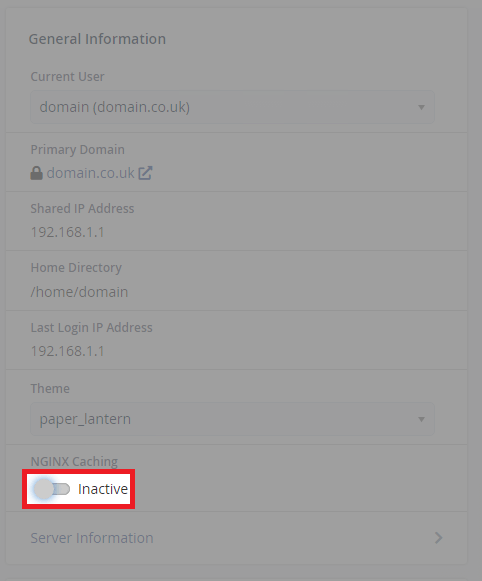
1. First off, from the main cPanel overview screen, navigate to the general information panel.
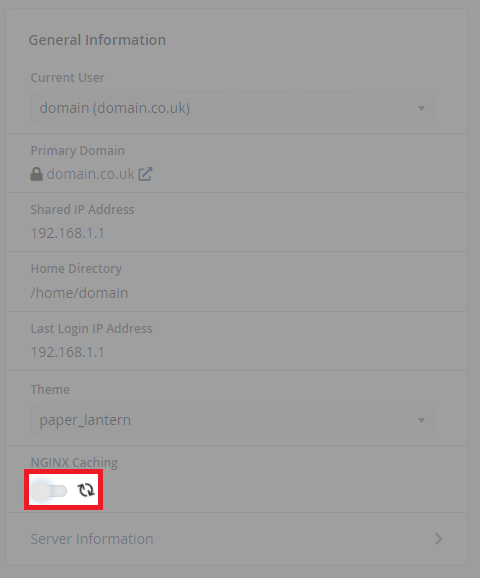
2. To enable the cache, click the highlighted radio button and a small spinning icon will appear.
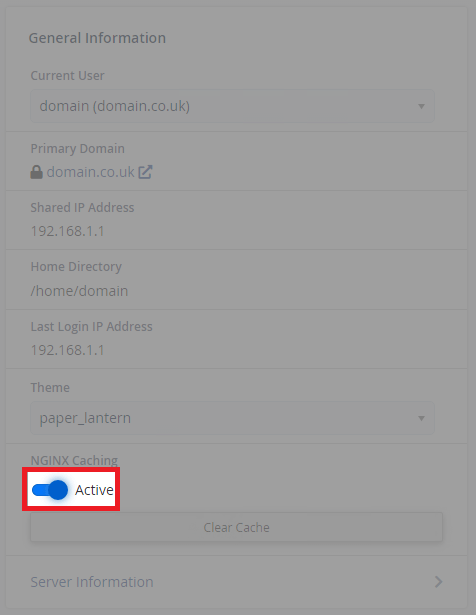
3. Caching is active when the button appears blue and “Active” appears.
Disable NGINX Cache in cPanel
1. To disable caching, click the highlighted button below, the loading icon indicates it is working.

2. Caching is disabled when the button appears clear and the text “Inactive” appears. It will also remove the “Clear Cache” button.
Clear Cache in cPanel
1. Clearing the cache is simple, just click the “Clear Cache” button as indicated below. If the cache clean-up is successful, a green banner will appear above.

Enable & Disable Cache in Plesk
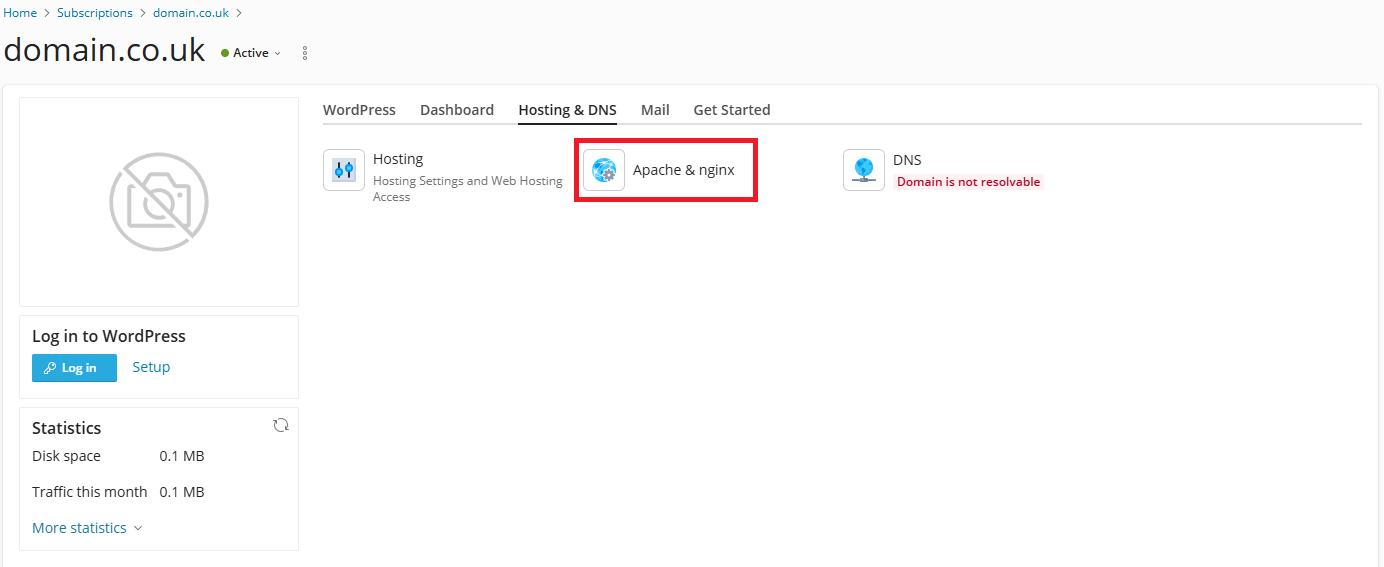
1. First off from your Plesk subscription click on “Hosting & DNS” and then click on “Apache & nginx” as shown below.
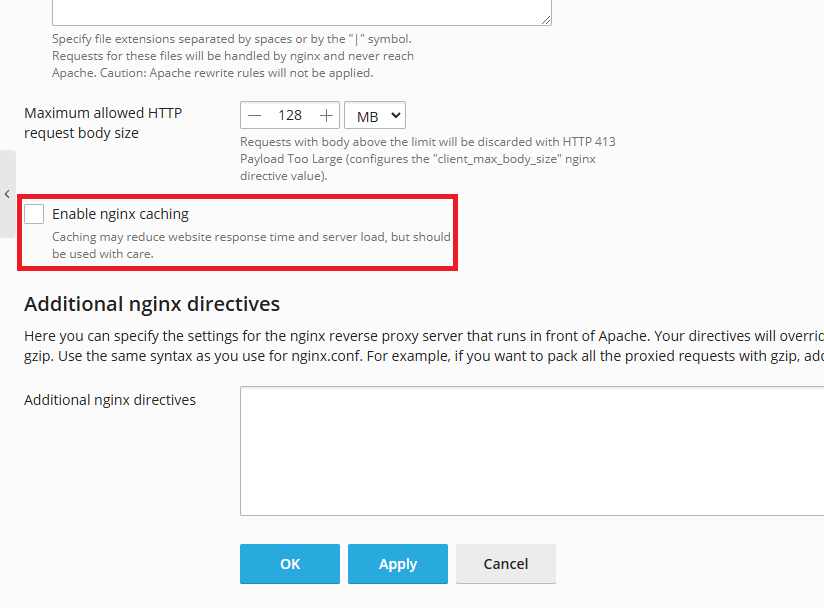
2. Moving on scroll down until you can see “Enable nginx caching” (highlighted below) if this is unticked as shown it means the cache is currently disabled for this domain in Plesk.
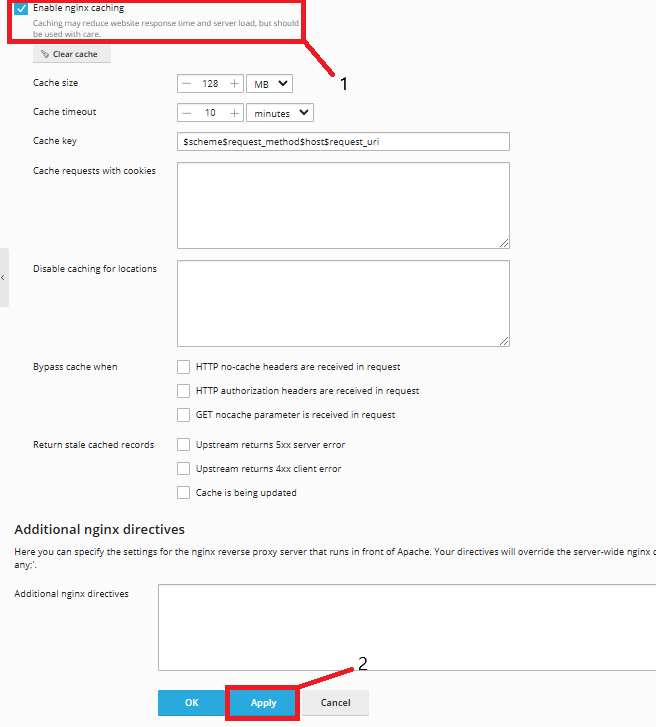
2. Finally, following on from above using the screenshot below tick the checkbox [1] to enable Nginx and then apply [2] to activate the cache for this domain. To disable repeat the process.
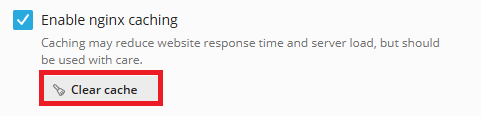
Clear Cache
1. Clearing the cache is straightforward following on from above under the Enable caching button a just click “Clear cache” as highlighted below.