How to install a free SSL certificate
Let’s Encrypt SSL certificates are an easy to use and free security enhancement to web hosting services. As a result, we provide Let’s Encrypt functionality across all of our cPanel hosting and Plesk hosting web servers including for our Resellers, who can secure all their clients for free, forever. We support both standard and Wildcard SSL certificates across all of our services including our shared hosting, the tools to install them come pre-installed on all our servers.
Install Let’s Encrypt
Firstly, the instructions for installing a free Let’s Encrypt SSL Certificate depend on which control panel you’re using: we support both cPanel and Plesk. It is important to realize that when installing a Wildcard SSL a DNS record will be created to validate the certificate, this DNS record will take time to propagate, so please allow some time for it to work. Unsure how to access your control panel?
Install with cPanel
- First off, login to your cPanel control panel.
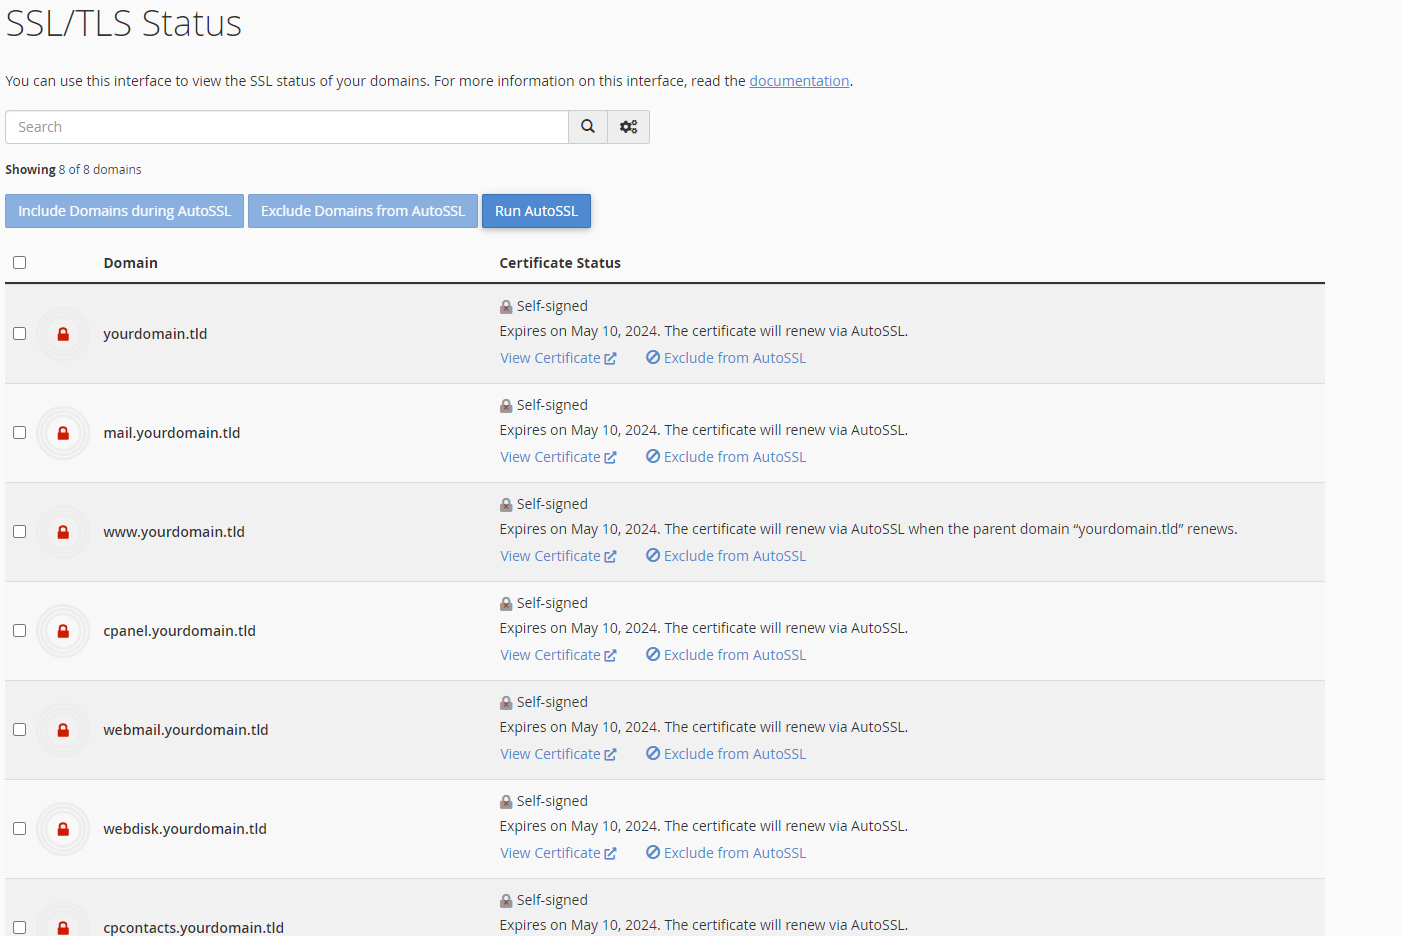
- Afterwards, navigate to the security section and click on SSL/TLS Status.

- Once in the AutoSSL tool, you can view all domains & subdomains in the account and their status, in the below image it shows an unsecured domain which will secure when AutoSSL next runs. Click run AutoSSL to start the process.

Install with Plesk
- First-off, login to your Plesk control panel. Below shows how to do this from the client area.

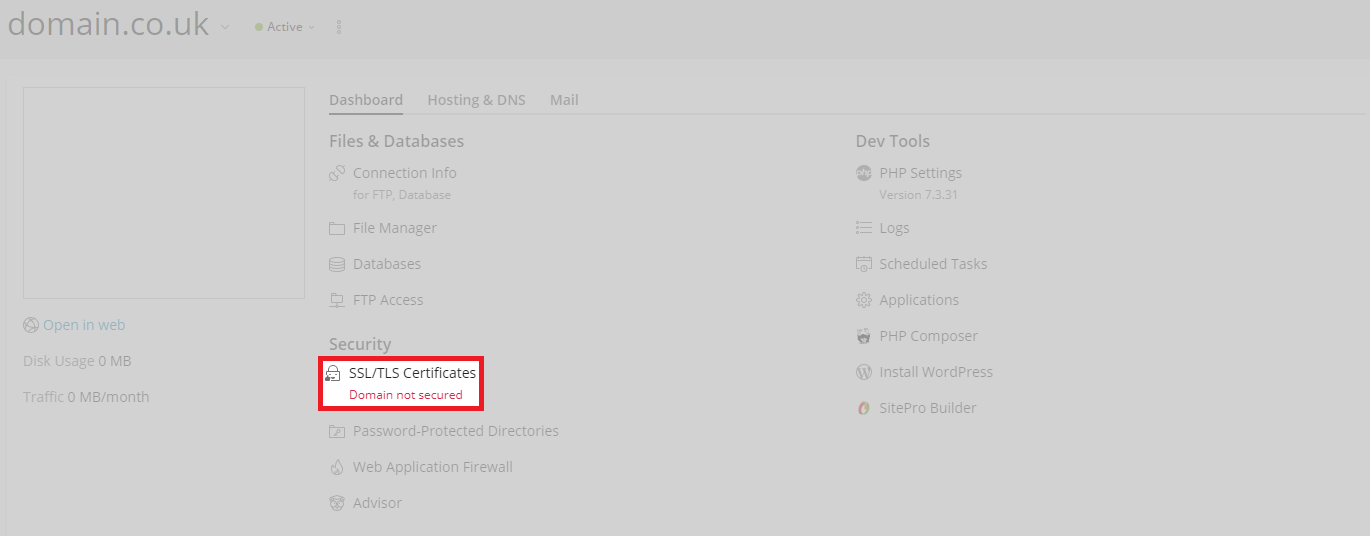
- Afterwards, from the domain view (main area) in the dashboard tab (under security) click on SSL/TLS certificates.

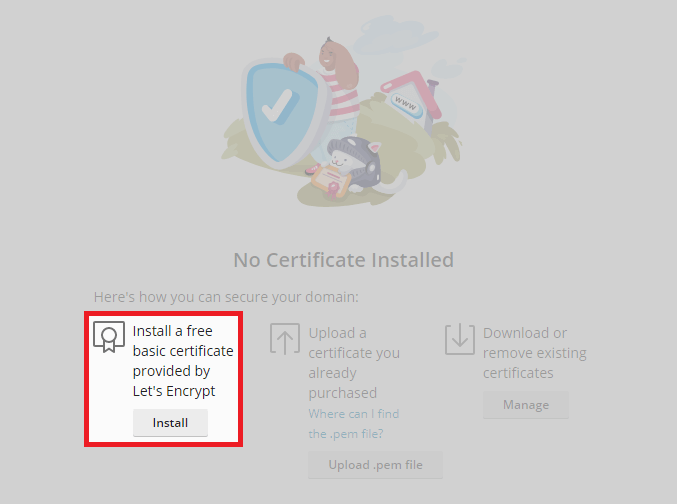
- From here, simply click install as shown below.

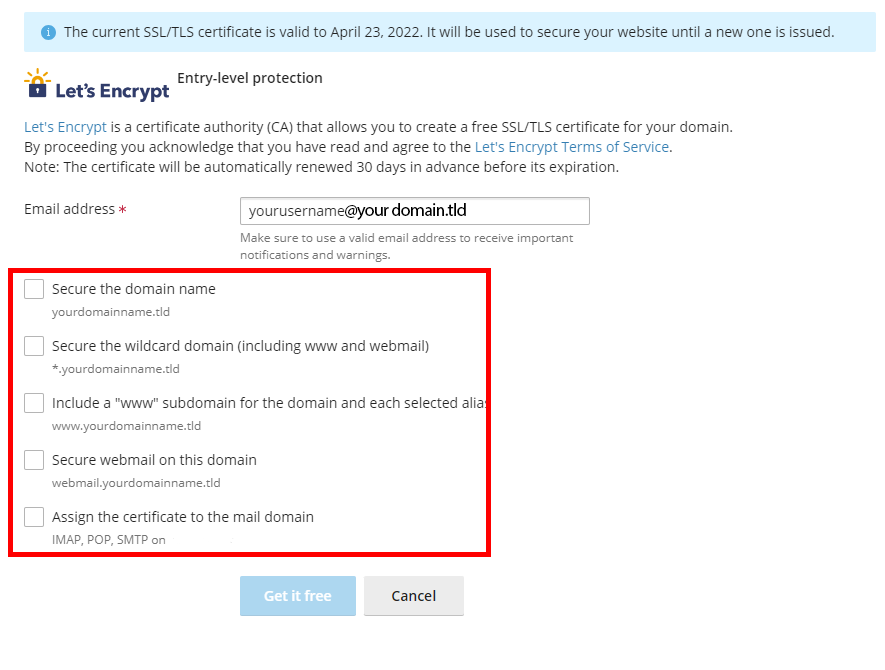
- Select which areas to secure and click Get it free.

Do not select wildcard as it will not automatically renew.
Once you have completed the installation of your Lets Encrypt SSL certificate, you may need to force your website visitors to use SSL for all connections to prevent insecure or mixed content warnings in the browser.
