How to flush your device’s DNS cache
A DNS cache is temporary storage on your device that keeps track of DNS information for recently visited sites, this helps speed up the browsing process by removing the need for repeated querying of external DNS servers. Most of the time this is great as regularly visited sites to load faster, in some cases this information becomes outdated leading to caching issues. These issues are usually resolved by flushing the existing cache forcing your device to query the external nameservers.
This is especially true in the cloud hosting environment, during web development there may be multiple changes to a sites zone made in a short timespan which can lead to your device having out of date zone records and potentially causing issues such as your website not loading. By following this guide and flushing your devices DNS cache you can quickly troubleshoot and resolve issues during the development stage of your website saving time and reducing your frustration.
Flush DNS resolver cache Windows 11
1. Log into your device and press the Windows key or click “Start Menu” as shown.

2. With the start menu open type the following.
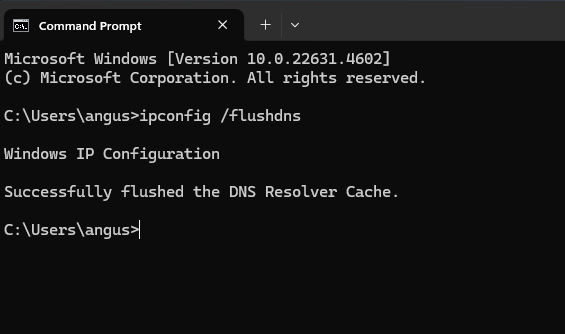
command prompt3. With the command prompt open, type the command shown below. This command flushes the local DNS cache.
ipconfig /flushdns4. If that command was issued correctly you will see “Windows IP Configuration Successfully flushed the DNS Resolver Cache”.

Flush the DNS Cache on Ubuntu 24.0
1. Start by logging in an opening a terminal window and entering the command below.
sudo systemd-resolve --flush-caches2. At this point you will be prompted to enter your account password to proceed.
3. After issuing that command successfully your local cache should be cleared to check that you can run.
sudo systemd-resolve --statistics