How to use chown in Linux
Using chown a system administrator (you) can control file and directory ownership. This is in turn sets who or what can modify those files – preventing unauthorised access whilst enabling any applications.
In a Linux environment, ensuring file ownership is managed correctly is critical and key part of keeping the environment secured. This is especially true for a VPS which might not have the same security features in place as a specific web hosting service.
This guide equips you with basic guidance for chown, including syntax and examples for specific commands that you are likely to use. Be careful running chown as incorrect usage especially recursively can cause irrecoverable issues.
Syntax
The command itself is fairly straightforward and is used to change the owner and group of files and directories. The example below shows the command to change the owner and group for the index.php file to root removing any error messages (the -f flag).
chown -f root:root /public_html/index.phpFollowing on from the above example, here is the syntax.
chown -[FLAGS] OWNER:GROUP [Directory, Path to file(s) or File(s)]
- [FLAGS] – Flags alter the command from the “default” state.
- OWNER – This value sets the owner either by username (ex. cPanel username) or ID.
- : – Separator between owner & group.
- GROUP – Group is optional, although some control panels (Plesk) require psacln or similar.
- FILE(s) – The file(s) or directory you want to change ownership of.
Using chown
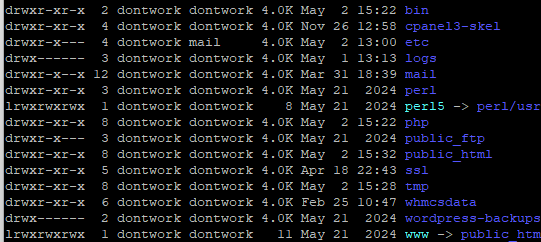
There’s usually a reason for changing file or directory ownership. Sometimes malware can change ownership of a file preventing access or general usage. Normally you would diagnose this by using the ls command to show current ownership. An example of the this is shown below first using cd to enter the directory and then using ls -l showing cpanelusername as the “owner“
root@cloudserver:~# cd /home/cpanelusername/
root@cloudserver:/home/cpanelusername# ls -l
drwxr-xr-x 4 cpanelusername cpanelusername 4.0K Nov 26 12:58 cpanel3-skel
drwxr-x--- 4 cpanelusername mail 4.0K Feb 7 08:00 etc
drwx------ 3 cpanelusername cpanelusername 4.0K Feb 10 12:14 logs
drwxr-x--x 12 cpanelusername cpanelusername 4.0K Feb 7 10:27 mail
drwxr-xr-x 3 cpanelusername cpanelusername 4.0K May 21 2024 perl
lrwxrwxrwx 1 cpanelusername cpanelusername 8 May 21 2024 perl5 -> perl/usr
drwxr-x--- 3 cpanelusername cpanelusername 4.0K May 21 2024 public_ftp
drwxr-xr-x 3 cpanelusername cpanelusername 4.0K Nov 25 21:31 public_html
drwxr-xr-x 5 cpanelusername cpanelusername 4.0K Jan 20 15:14 ssl
drwxr-xr-x 7 cpanelusername cpanelusername 4.0K Dec 20 10:03 tmp
lrwxrwxrwx 1 cpanelusername cpanelusername 11 May 21 2024 www -> public_html
How to Change the Owner of a File
To change the owner of a file, use:
chown username file.txtHow to Change Group Ownership
You can change group ownership by adding the : (separator) followed by the new group.
chown :username file.txtHow to change multiple files
You can specify multiple files to change on one line provided that you use the correct location. The command below will change ownership (and group) for file.txt, file2.txt and index.php to username:username.
chown username:username file.txt file2.txt /public_html/index.phpHow to Change Directory Ownership
Changing directory ownership doesn’t automatically apply to files or subdirectories inside the directory, for that you would need to use the recursive option.
chown username:differentusername /public_html/websiteChange files and directories at the same time.
chown username:differentusername file.txt /public_html/website /public_html/website/file3.txtHow to Use Recursive chown
The recursive option will change ownership of everything within a folder to what you set.
chown -R username:username /home/public_html/Now, every file and folder inside the public_html directory has the owner and group username.
