Install an SSL certificate
By securing your domain through an SSL certificate, you reassure visitors to your website of both it’s security and authenticity. Customers feel safer and, thus, are more willing to shop or sign up there.
There are 3 main types of SSL Certificate :
- Domain Validated
DV certificates provide a basic level of authentication (A DV cert can be identified by a padlock in the address bar). - Organisation Validated
OV certificates are similar to DV but are tailored towards organisations. The identity of the organisation having to be verified before the certificate is issued. Depending on the issuer, DV certificates usually offer a higher level of warranty in the event of anything going wrong on the CA’s (Certificate Authority) end. - Extended Validation
EV certificates are different and can be discerned through visiting a larger organisation, specifically one involved in finance. They require more authentication to obtain and are the most expensive of the 3. One of the biggest benefits of EV used to be a green tag in the address bar since SSL is becoming more of a necessity than a choice. Major browsers have started to discontinue this (Chrome, Firefox).
Install SSL with cPanel.
You can install a certificate in cPanel in two different ways, using a CRT file that will attempt to automatically load other areas itself. Or manually using the private key guide. Please follow from the step below, then select which guide you require.
1. Log into your cPanel control panel area, and from here navigate to the Security section. Clicking on SSL/TLS as shown below.

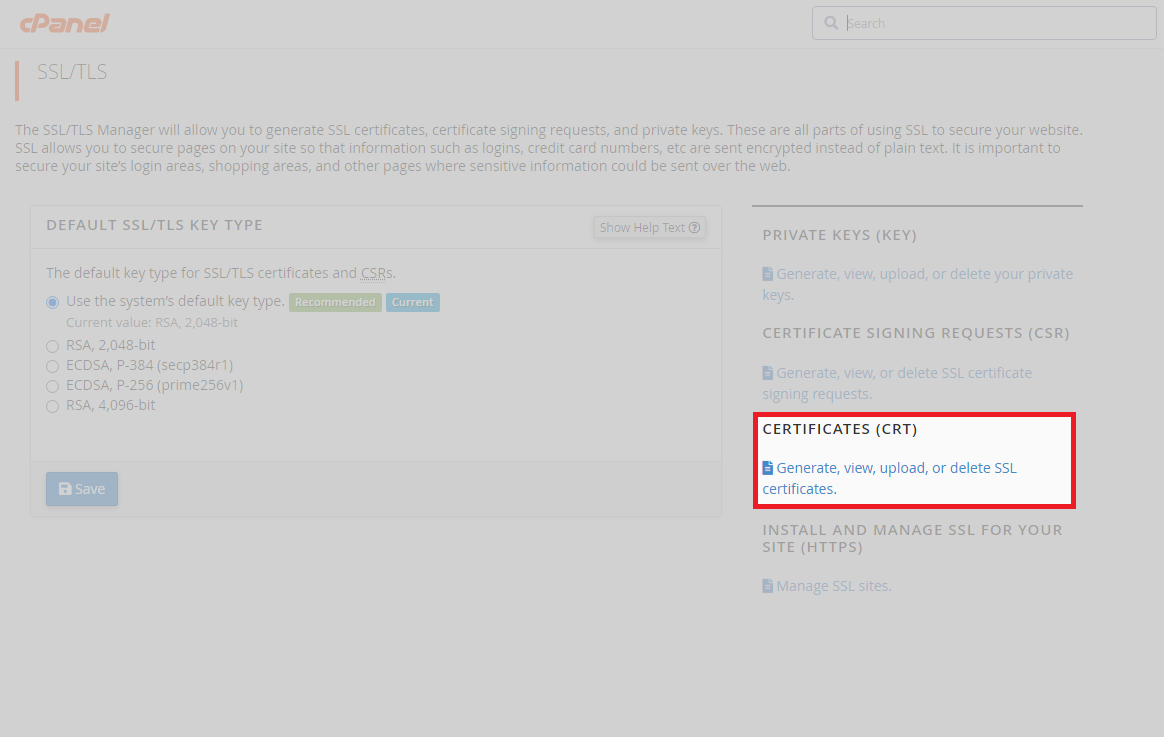
2. Firstly, after entering the SSL/TLS area, click ‘Generate, view, upload, or delete SSL certificates.’ this will take you to the SSL installation area for your cPanel.
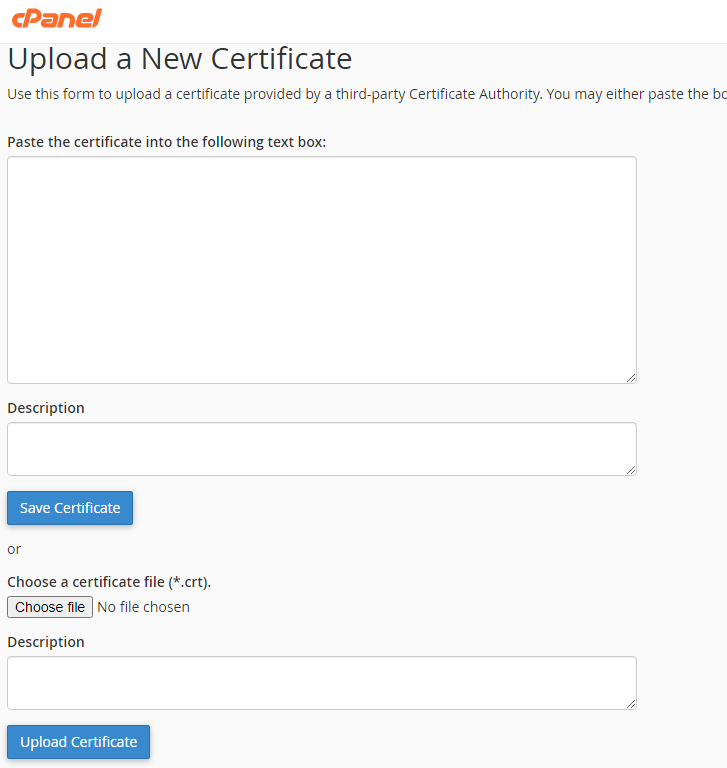
3. If your provider has issued you with the text version of the certificate, paste it in the box provided and press Save Certificate. Otherwise, if your provider has issued you with a .crt file, click Browse under Choose a certificate file and then click Upload Certificate.
4. Once you have uploaded the certificate, refresh the page. It will appear at the top of the page under certificates on this server. From here, you can install the correct certificate by clicking the install button.

SSL certificate installation using a private key.
1. From the SSL/TLS area, firstly click on Private Keys as shown below.
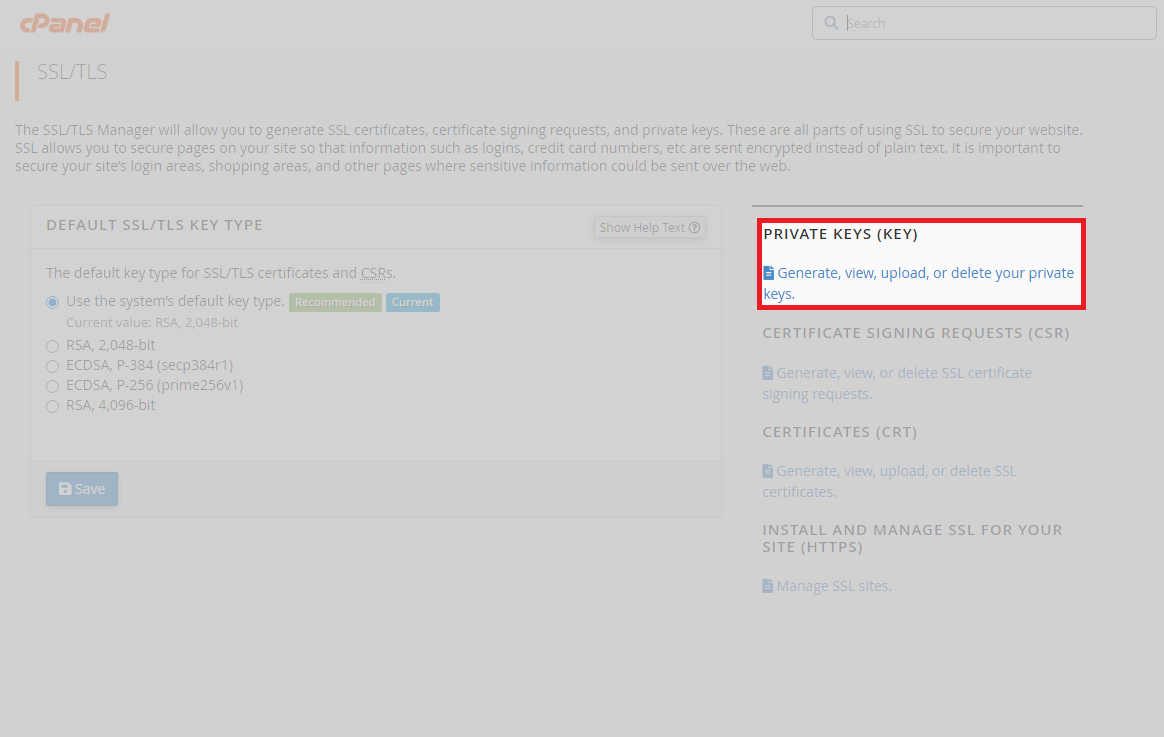
2. In the private keys section, click Edit to select the private key.

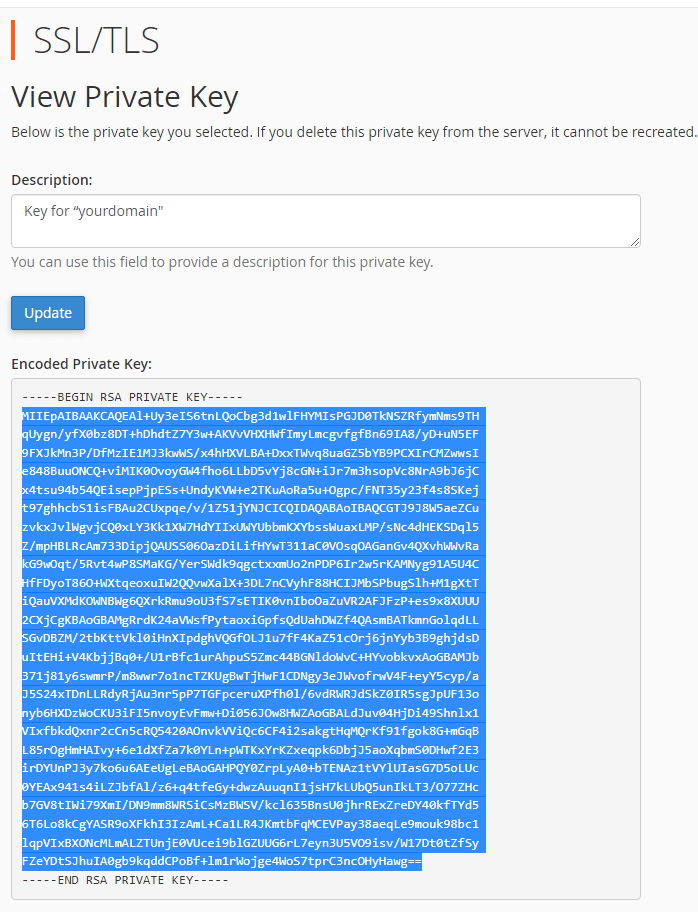
3. Afterwards, proceed to copy the encoded private key as shown. After copying the key, navigate to the bottom of the page and click go back to SSL Manager.
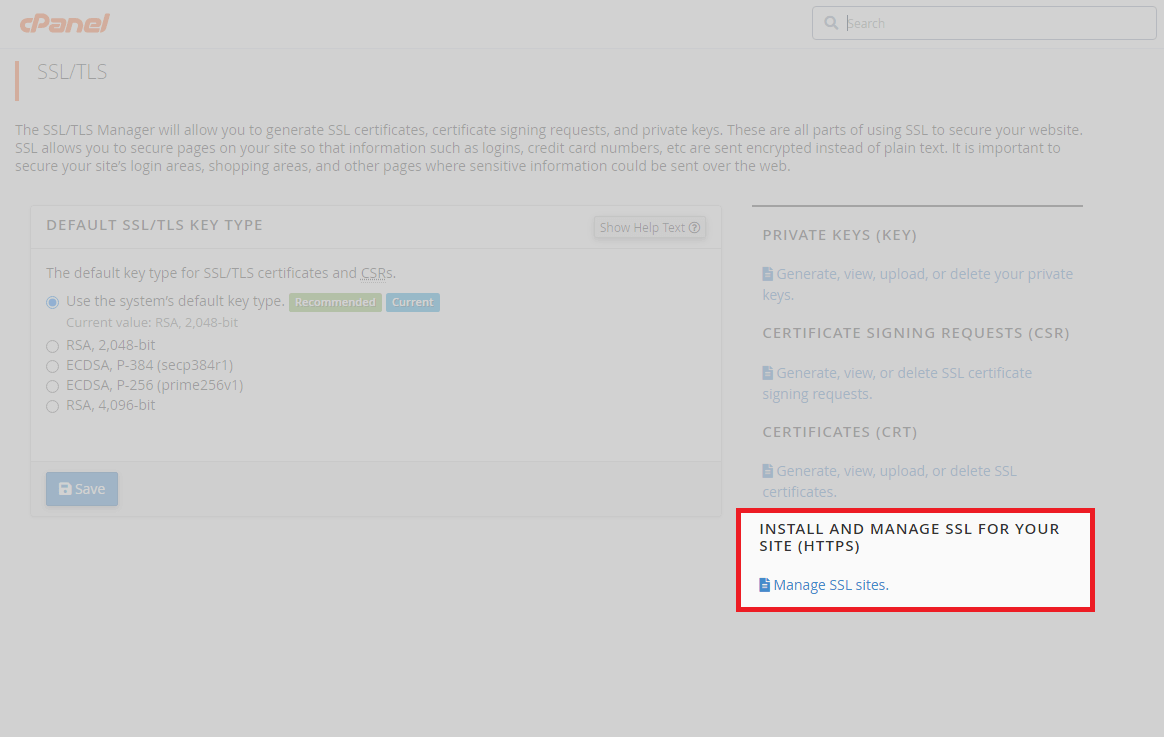
4. Once back in the SSL manager, click Manage SSL sites.
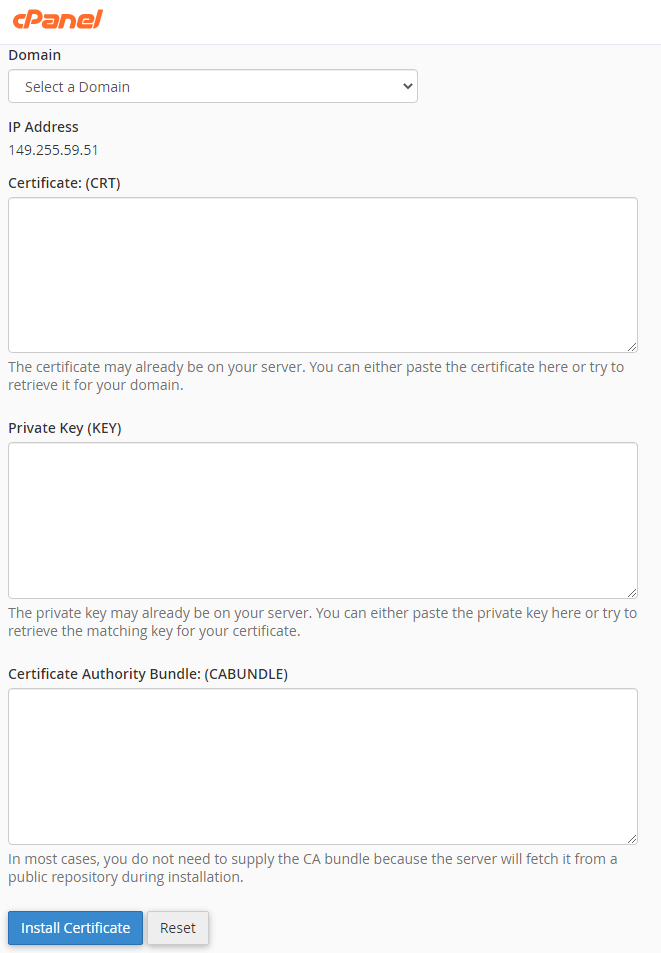
5. From here, select your domain from the drop-down list. And paste the previously copied encoded private key into the private key section. Enter either the text version or upload the crt file. Also, do the same for the ca-bundle. Clicking the install button when done.
Install SSL with Plesk
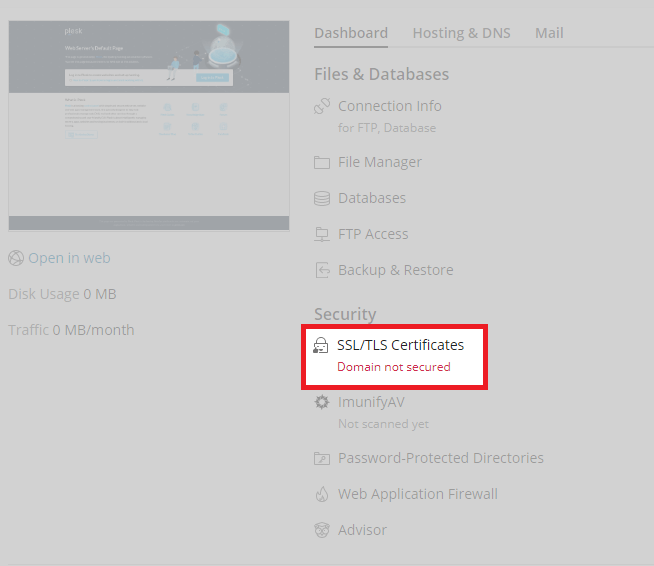
1. Log into your Plesk control panel. For the domain you wish to install the SSL on, Click SSL/TLS certificates.
2. From here, please click manage under download or remove existing certificates.
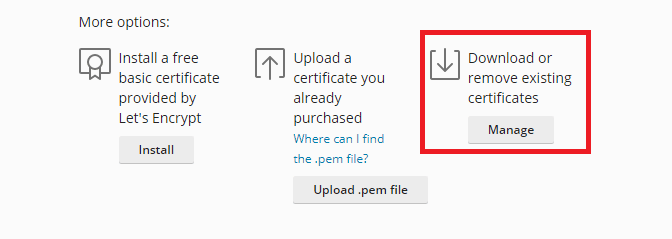
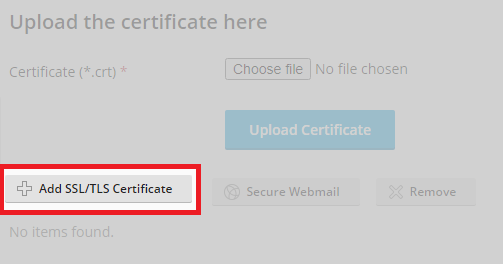
3. Once you have clicked manage, you can proceed to add your SSL/TLS certificate. This is assuming you have already generated a CSR for this domain in Plesk (As this will assign the private key automatically).
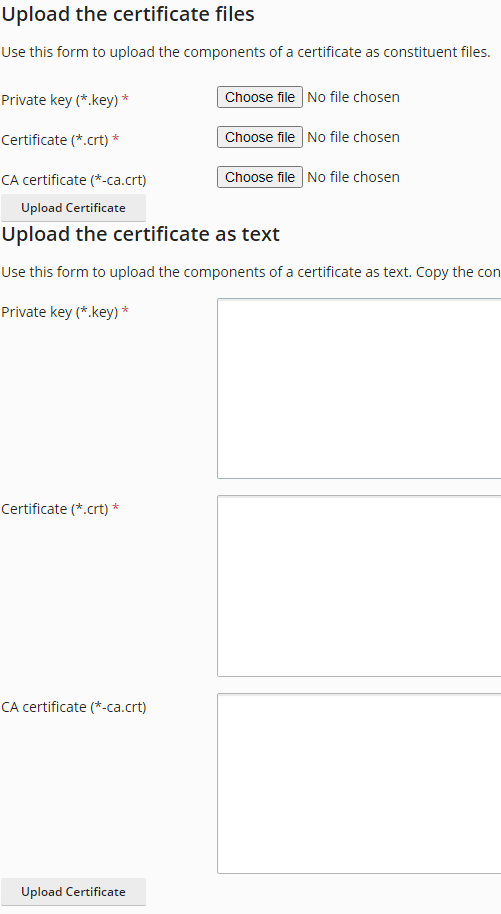
4. The add SSL area in Plesk will look similar to this, from here you can either paste in the raw text key files or simply upload the files themselves. Clicking the upload certificate button when done.
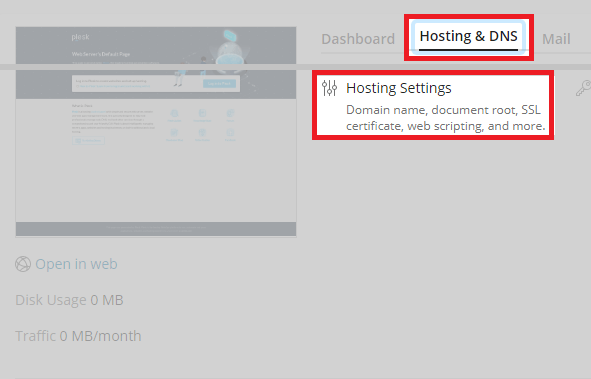
5. After your certificate is uploaded, it will need to be assigned to your domain. Return to the main domain area and click on Hosting & DNS followed by Hosting settings.
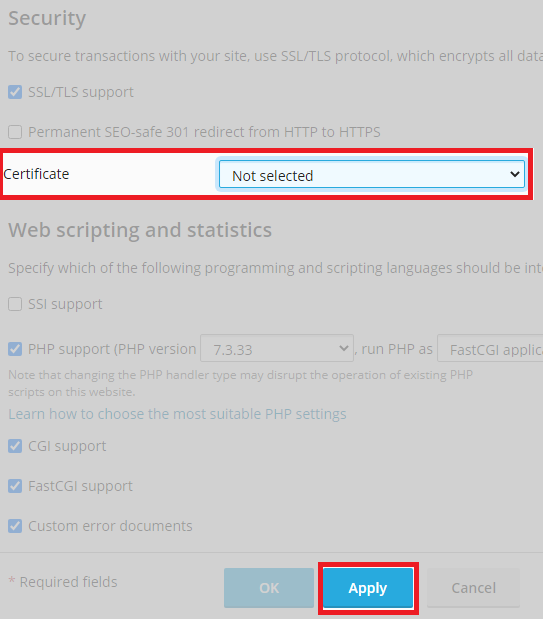
6. Select your newly installed certificate from the drop-down list and click apply.
