
Get Started with Reseller Hosting
Setting up a reseller hosting business with WHM and cPanel allows you to manage multiple client websites efficiently under one hosting account. This guide walks you through some of the core setup processes, highlighting key features of our reseller platform, and explaining how to get your services off the ground.
With the right configuration, you’ll be able to offer fully white-label hosting services, automate billing and provisioning, and provide your customers with a professional hosting experience.
1. Log In to WHM (Web Host Manager)
Start by accessing WHM using the credentials provided by your hosting provider. WHM is the administrative interface used to manage client accounts and server-level settings.
- URL: Typically https://domain.tld/whm or the IP followed by :2087
- Use your reseller username and password
Once inside, familiarise yourself with the dashboard layout—this is where you’ll spend most of your time managing accounts.
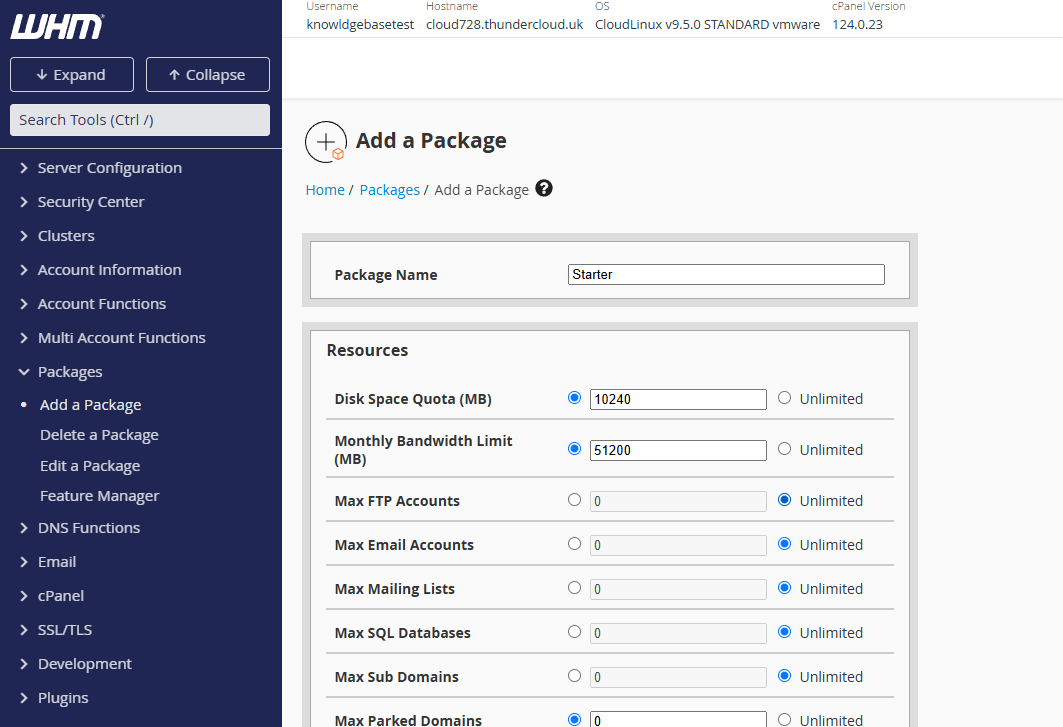
2. Configure Hosting Packages
Before you can create client accounts, you’ll need to define your hosting plans under “Add a Package”.
Set limits for:
- Disk space
- Bandwidth
- Number of email accounts (optional, if enabled)
- FTP accounts
- Databases
- Addon domains
Each package requires a unique name, try making it related to the business you are aiming for. Starter, Premium, Pro, Enterprise are all perfectly fine candidates for a plan name.
3. Create cPanel Accounts for Clients
Go to “Create a New Account” in WHM to set up individual hosting accounts for clients.
You’ll need to provide:
- Domain name (used for cPanel login and DNS)
- Username
- Password
- Email address
- Assigned hosting package
This creates a unique cPanel account, giving the client access to manage their own website, databases, and settings independently.
4. Enable WHMCS for Automated Billing and Provisioning
To streamline client onboarding and service delivery, integrate WHMCS with your reseller hosting account.
- Purchase and install WHMCS
- Connect your hosting account using the provided WHM/cPanel module
- Configure products, pricing, and welcome emails
Once set up, WHMCS can automatically provision accounts, send invoices, suspend unpaid accounts, and manage client support requests.
5. Migrate Existing Websites
If you’re moving clients from another host, use the migration centre to help move the accounts over. Or transfer over those clients manually.
You can:
- Automatically migrate full cPanel accounts* with our serviced migration centre.
- Manually migrate over full packaged cPanel accounts.
- Manually migrate websites, databases, email and much more.
As with any migration check DNS settings after and allow time for propagation (up to 48 hours in some cases).
6. Customise Your Branding
Create a white-labelled experience by configuring custom branding in WHM.
Steps include:
- Uploading your logo and favicon
- Customising the login theme and footer text
- Setting your own support URLs and contact links
This ensures clients see your brand not the hosting provider’s—throughout their user journey.
7. Secure All Hosted Websites
As your hosting provider we include free SSL certificates (via Let’s Encrypt) for all your resold clients using AutoSSL, we also offer paid for premium SSL certificates.
From here with the certificate installed you can enable forced HTTPS redirection for those websites to ensure that you can only access via the secured version of HTTP.
8. Use Built-in Security Features
Most cPanel hosting includes firewalls, malware scanning, and brute-force protection.
Enhance security by:
- Enforcing strong passwords
- Limiting SSH access to specific IPs
- Blocking malicious IP ranges via cPHulk or similar tools
You can also implement two-factor authentication for both WHM and cPanel logins.
*Terms Apply