
How do I force HTTPS on my website?
When you force HTTPS for everyone it means that with an installed certificate – your site will be fully secured using SSL/TLS. Therefore, it’s crucial to enable HTTPS to benefit from the protection an SSL/TLS certificate offers.
Why Should I Force HTTPS on My Site?
HTTPS is the secure version of HTTP, and when paired with SSL, it ensures privacy and data integrity across your site. Modern browsers such as Google Chrome and Mozilla Firefox will flag sites as untrustworthy or dangerous if HTTPS isn’t active. Enabling HTTPS helps protect user data and improves your site’s credibility.
Force HTTPS with .htaccess
The .htaccess file, which is hidden by default, is used to configure various server settings, including forcing HTTPS. To access the file, enable the viewing of hidden files in your FTP software or control panel settings.
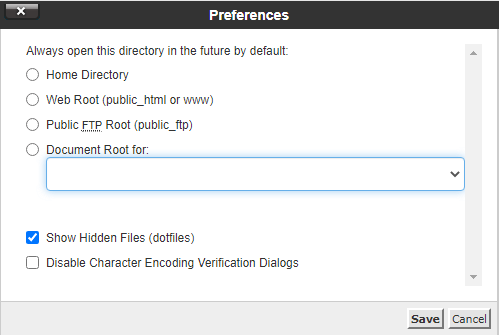
1. In cPanel, enable the viewing of hidden files by clicking the settings cog and ensuring the option for hidden files is selected.
2. Once the .htaccess file is visible, add the following code to redirect your website to HTTPS:
RewriteEngine OnRewriteCond %{HTTPS} offRewriteRule ^(.*)$ https://%{HTTP_HOST}%{REQUEST_URI} [L,R=301]3. Save the .htaccess file.
4. Test if the redirection works by entering your site URL in your browser.
Forcing HTTPS in cPanel
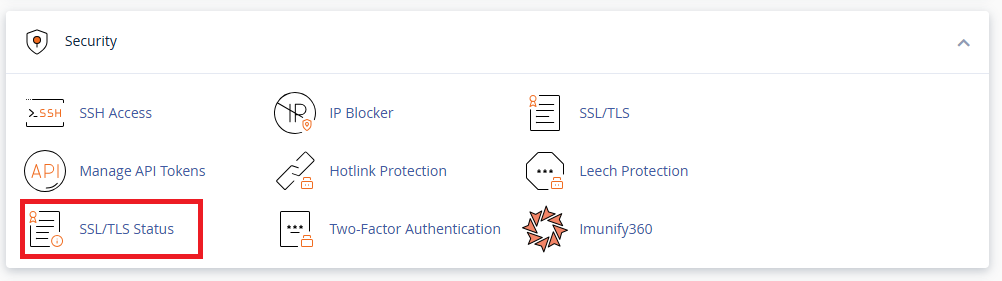
1. Log in to your cPanel control panel and go to SSL/TLS Status under the Security section.
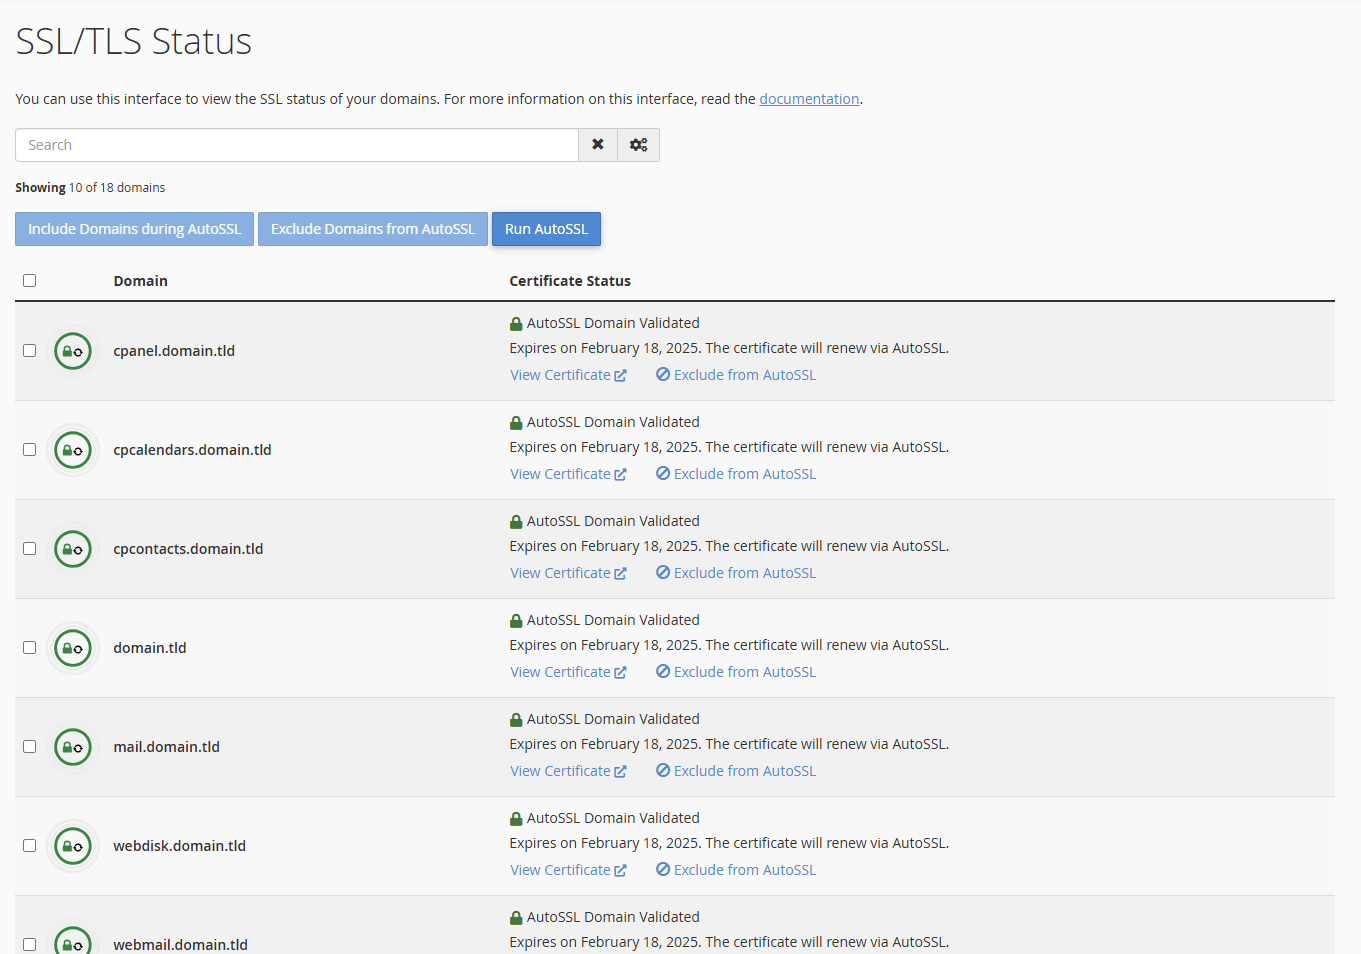
2. Select the domain you want to install an SSL certificate for.
3. Run AutoSSL and let it complete the process. Once it finishes successfully, you’ll see a success notification. cPanel will then request a certificate from the issuing authority, and if successful, it will be visible in AutoSSL.
Forcing HTTPS in Plesk
- Log in to your Plesk control panel and click Websites & Domains from the left sidebar.
- Choose the domain you wish to configure and click Hosting Settings.
- Under Security, check the boxes for SSL/TLS support and Permanent SEO-safe 301 redirect from HTTP to HTTPS.
- Select the correct SSL certificate from the drop-down list.
- Confirm the changes by clicking OK.