Secure mail with SSL on Plesk
When you send and receive email via your domain name using IMAP, POP, and SMTP, you should secure the mail with an SSL/TLS certificate. This provides increased security to your mail, allowing you to use secured ports during setup and enhancing your trustworthiness; it is also more professional.
You can easily secure your mail in Plesk for free! The built-in Let’s Encrypt tool makes this straightforward, direct from your Plesk control panel. Unsure how to access Plesk? Learn how to access your control panel here.
Secure Mail with SSL
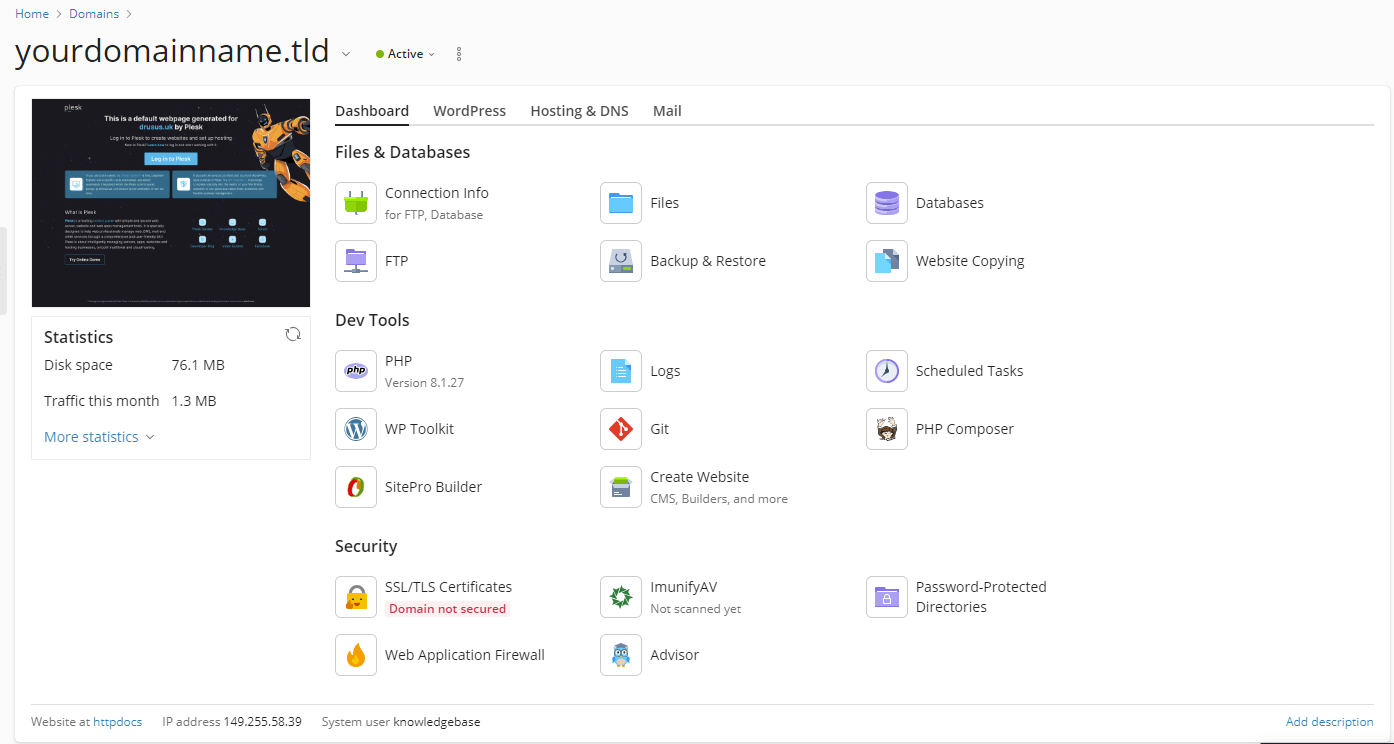
1. Your Plesk area should look like this, in the security section click ‘SSL/TLS Certificates’

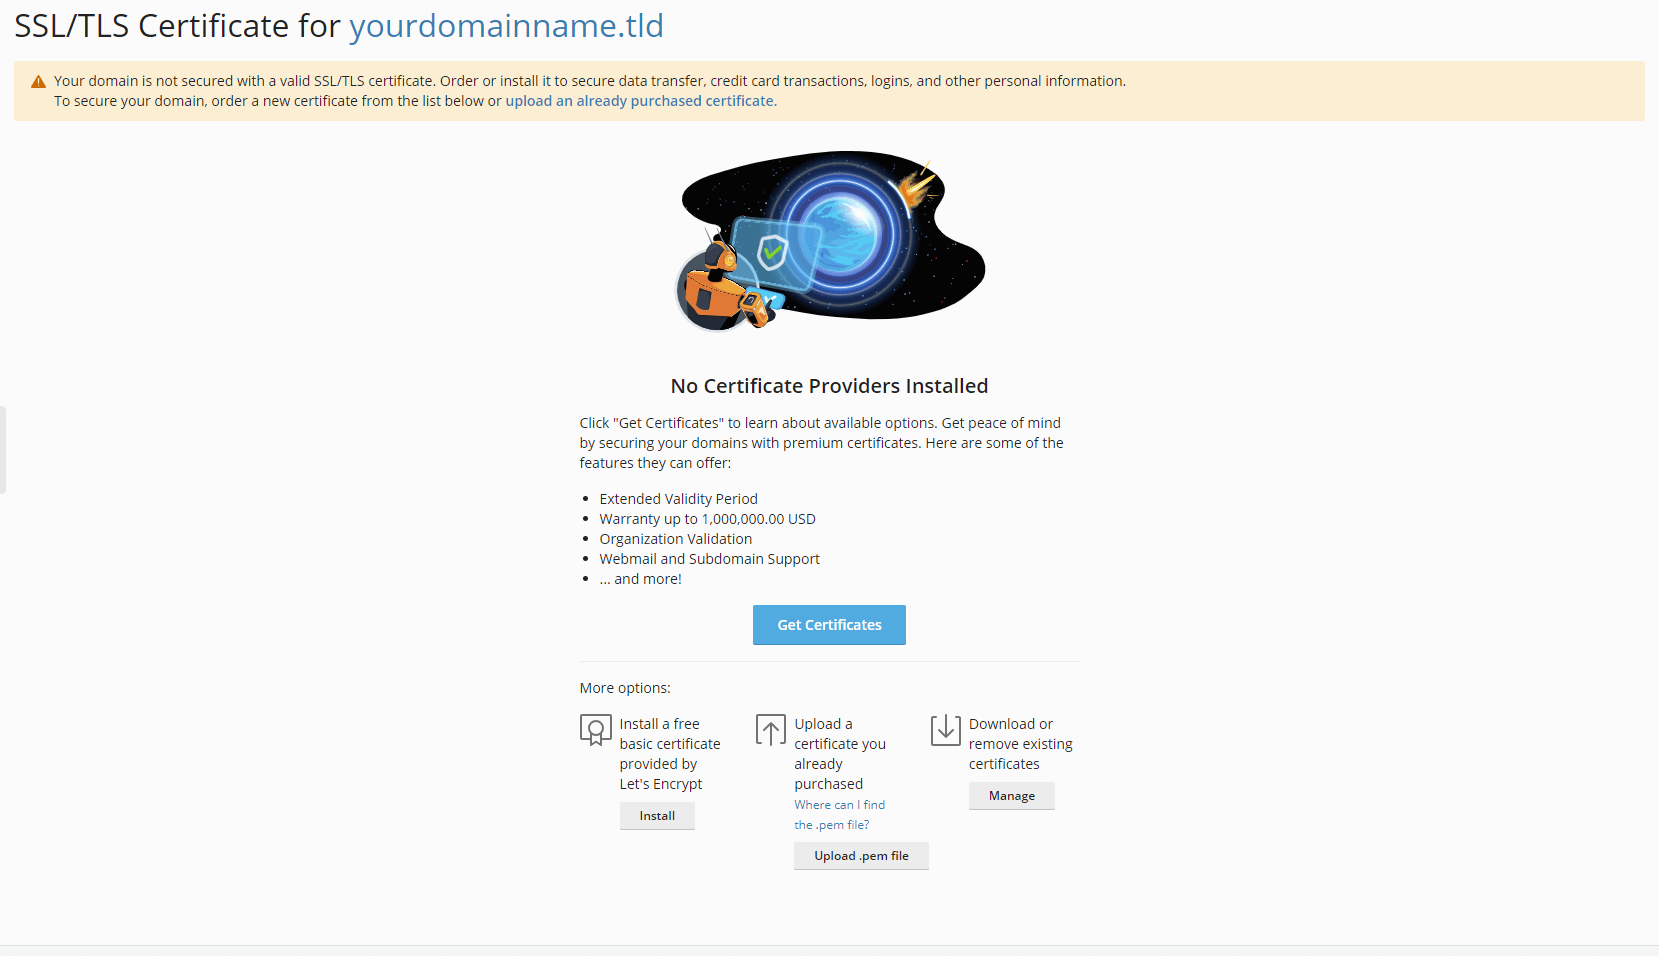
2. From the SSL/TLS Certificate page under ‘More Options’ and, then ‘Install a free basic certificate provided by Let’s Encrypt’. Click ‘Install’.

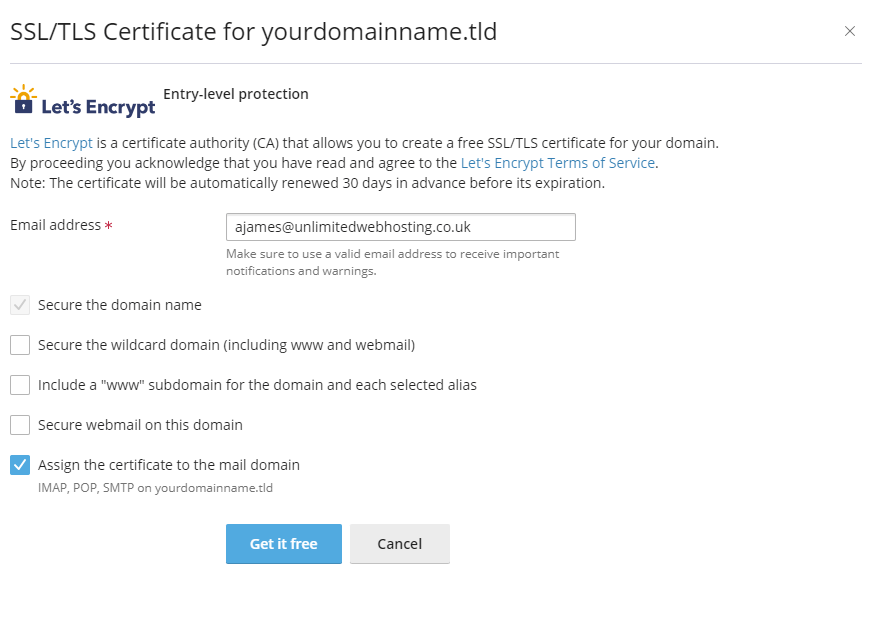
3. From the next SSL/TLS Certificate page, looking at the five checkboxes, click ‘Assign the certificate to the mail domain’. Then, click ‘Get it free’.

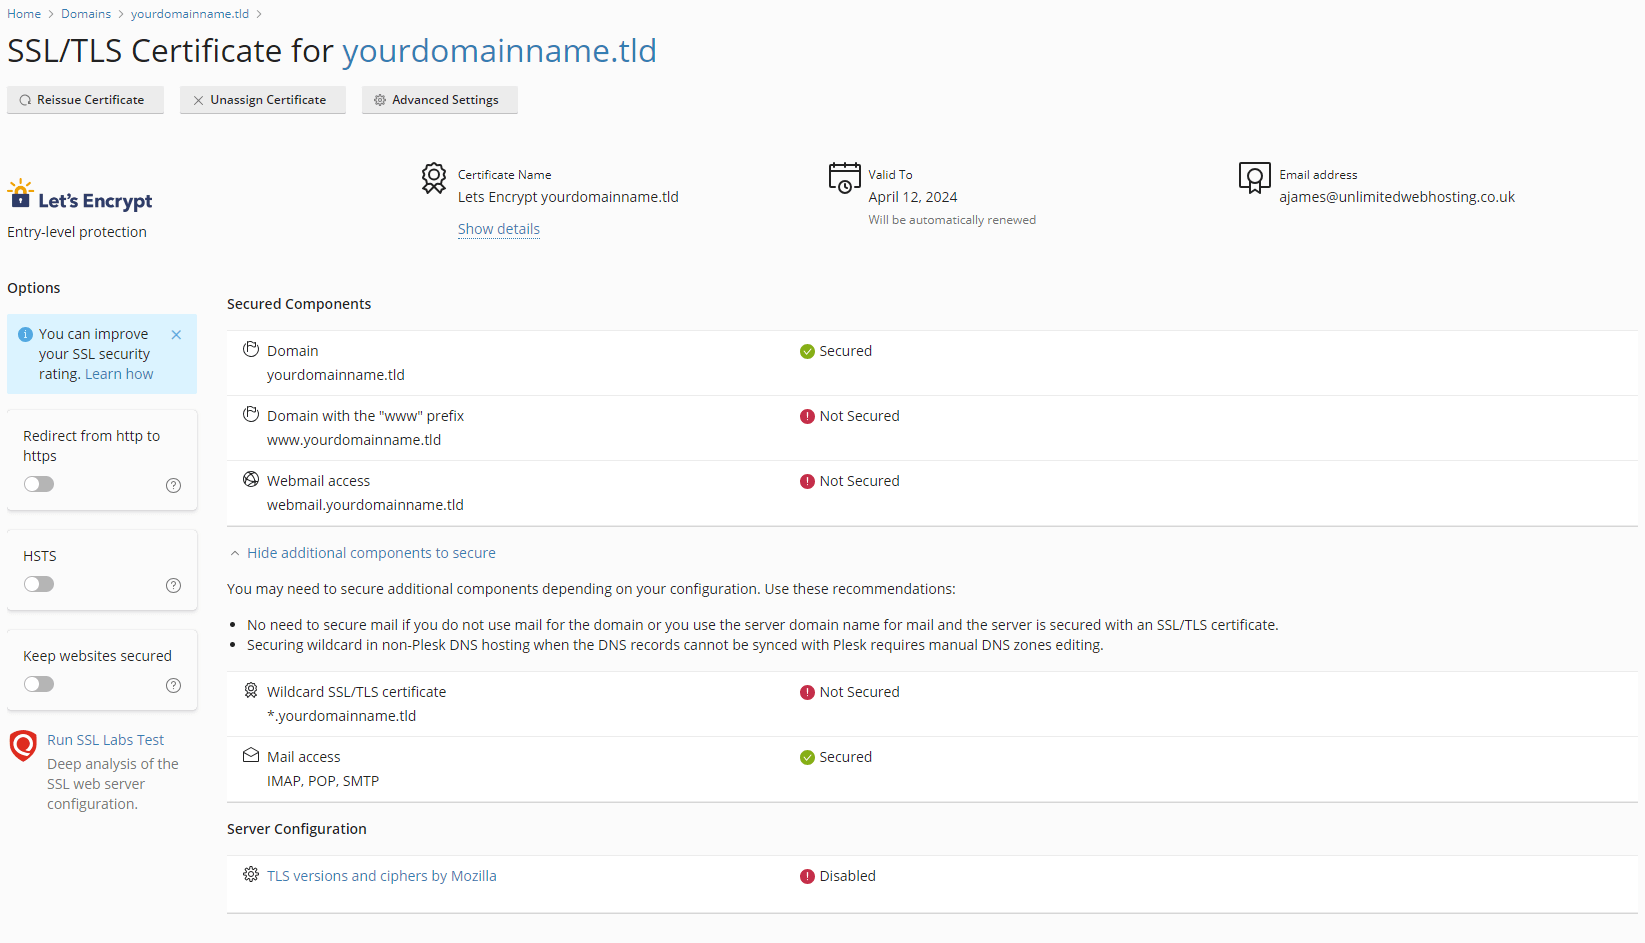
4. Finally, from the next SSL/TLS Certificate page, click ‘Show Additional Components to Secure’. Additional information is now visible, and ‘Mail Access’ should be displayed as ‘Secured’ with a green checkmark.

5. After securing your mail for your domain name, ensure that it is being used correctly by configuring your mail to use the correct (secure) ports. Then, add your email address to Outlook.
