How To Access Your Control Panel
To access either your cPanel, WHM, or Plesk control panel, you must first have an active hosting account. This can either be a cPanel hosting account, a Plesk hosting account, or a licensed product on your VPS hosting package.
There are two primary ways to log in: through the client area or directly using the login details provided in your welcome email. Each method has its own advantages. Logging in via the client area can be quicker, but as a reseller, you may prefer the white-label login page that’s provided with direct access.
Log in via the client area
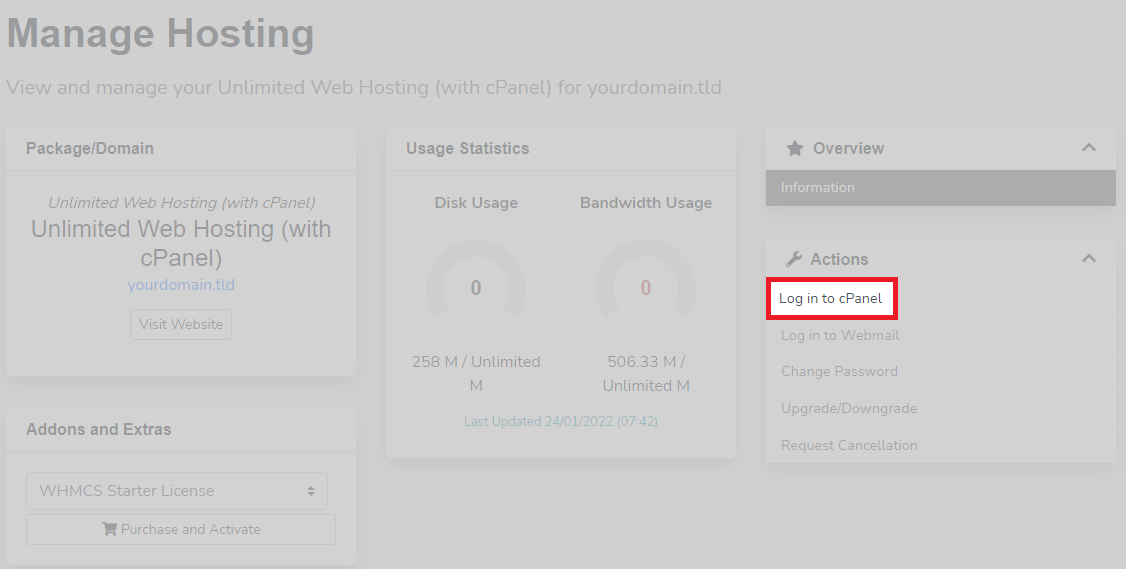
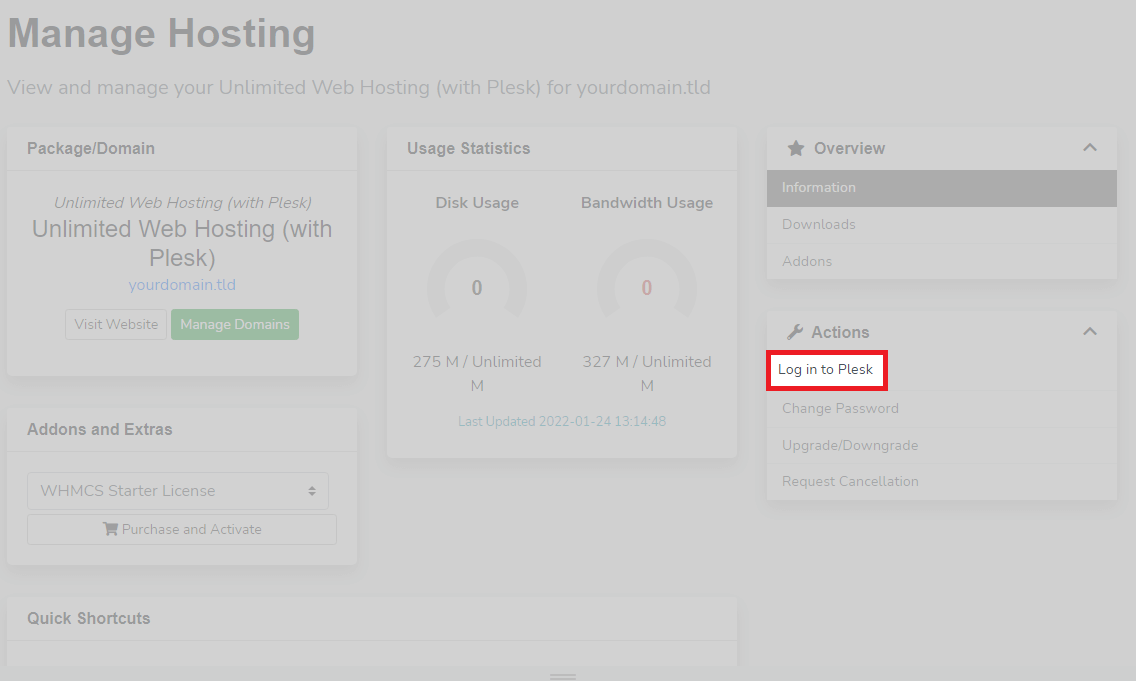
You can log in to either your cPanel or Plesk control panel via the client area. Simply click the login to cPanel or log in to Plesk button as shown below.
Login to cPanel from the client area
Login to Plesk from the client area
If you cannot access your control panel this way, it may be due to discrepancies between the details stored in the client area and those in cPanel. This can happen if changes were made in cPanel, WHM, or Plesk (such as account password updates) but were not reflected in our system. If the username or details have changed and this hasn’t been updated on our side, contact our support team for assistance.
Log in directly
After purchasing, you will receive an automated email from us providing you with full login details and a URL for your panel. This will look similar to the below message.
This example message is for a Plesk account.
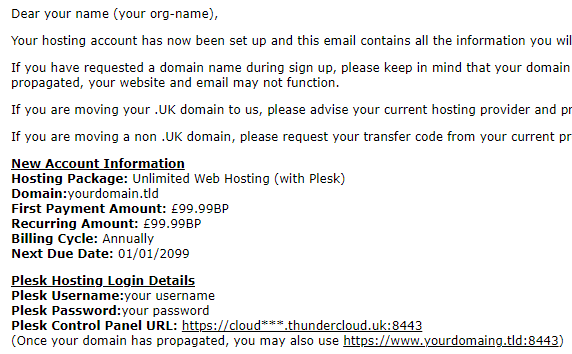
You can use the information above to sign in to your control panel of choice. Access to your hosting panel should always be available through the server’s hostname.
cloud123.thundercloud.uk:2083
An example server hostname.
Once set up in cPanel, it will take time for a domain to propagate. After which, cPanel, WHM, and Plesk will all be accessed directly from the domain. Below, we go into further detail about how each of the login interfaces looks and how to get to them.
Access your cPanel control panel
The URL for cPanel is the name of your server followed by 2083, the port used for cPanel.
How to access WHM
The URL for WHM replaces 2083 for either 2087 (the port used for WHM) or /WHM.
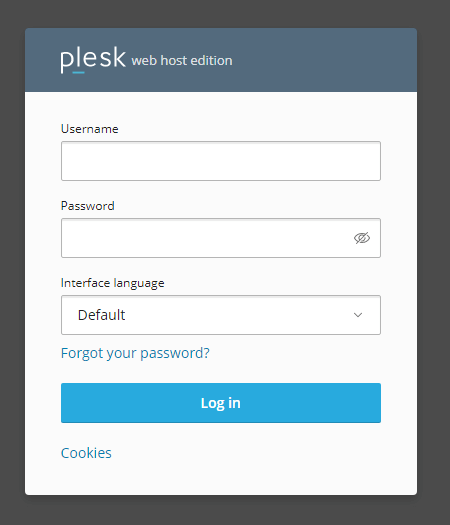
How to access Plesk control panel
The URL for Plesk is similar but replaces 2083 or 2087 for 8443.