
How to create additional FTP accounts
FTP (File Transfer Protocol) is a key service provided to all shared hosting customers, enabling efficient and secure file transfers between the server and any FTP-compatible device. With FTP, you have complete control over your files, enabling you to back them up locally, make changes, update information, or perform critical updates efficiently.
Why Do I Need Separate FTP Accounts?
Once you’ve purchased a hosting plan, you’ll receive an email containing your FTP login details. This login gives you full access to your cPanel or Plesk control panel, allowing unrestricted access to your files, emails, and website data.
Creating separate FTP accounts is beneficial, especially for restricting developer access. With additional accounts, you can limit access to specific folders, ensuring that users can only modify the files you’ve given them access to.
Why Use FTP Over the File Manager?
While the cPanel File Manager is suitable for smaller file changes, FTP offers distinct advantages:
- Faster Transfers: FTP is ideal for larger files that might time out in a browser.
- Queueing Capabilities: FTP allows you to queue multiple files for upload/download, which is perfect for power users.
- Reliability: FTP ensures smoother, uninterrupted transfers compared to the File Manager.
How do I add FTP accounts?
FTP or file transfer protocol allows you to easily upload, download, edit, and view files within your account. To use this on our services, you need to have:
- A valid account.
- FTP software for the purpose of this article, we’re using FileZilla.
When you order any hosting service with us, the automatic process creates an FTP user account. This user account includes a unique username and password and provide direct access to the FTP server. You can locate these details in your welcome email.
Making a new FTP account
There are several benefits to creating additional FTP accounts:
- Allow authorised users to access FTP without needing your main login details, restricting their access to only what you want.
- Set quotas for FTP accounts, limiting their usage without impacting your own limits.
- Multiple accounts enable simultaneous FTP connections and transfers, improving efficiency.
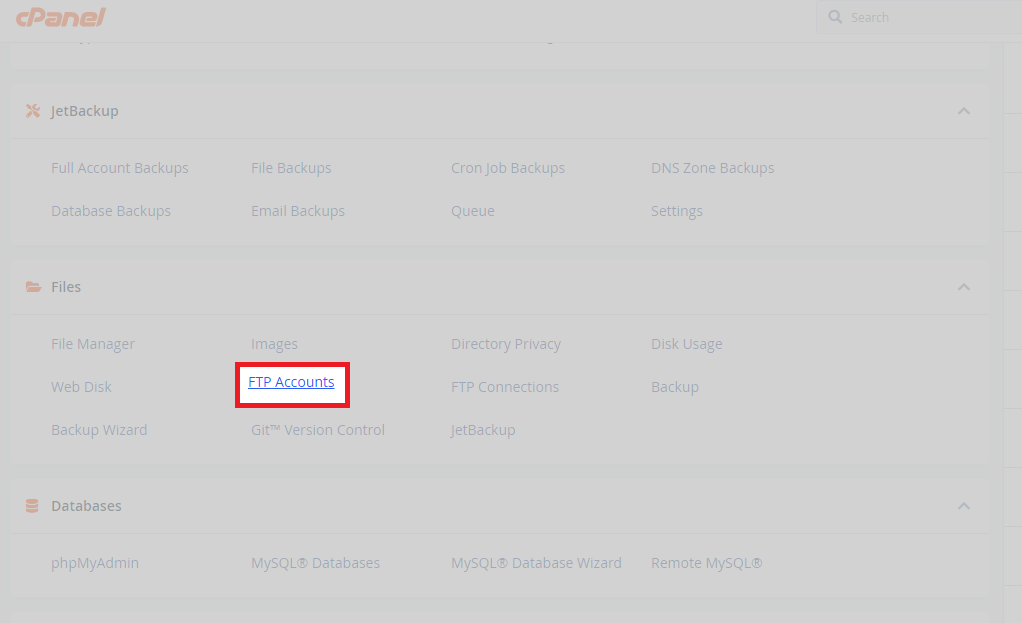
How to Set Up FTP Accounts in cPanel
1. Log into your cPanel control panel.
2. Navigate to the FTP Accounts section under the Files area.
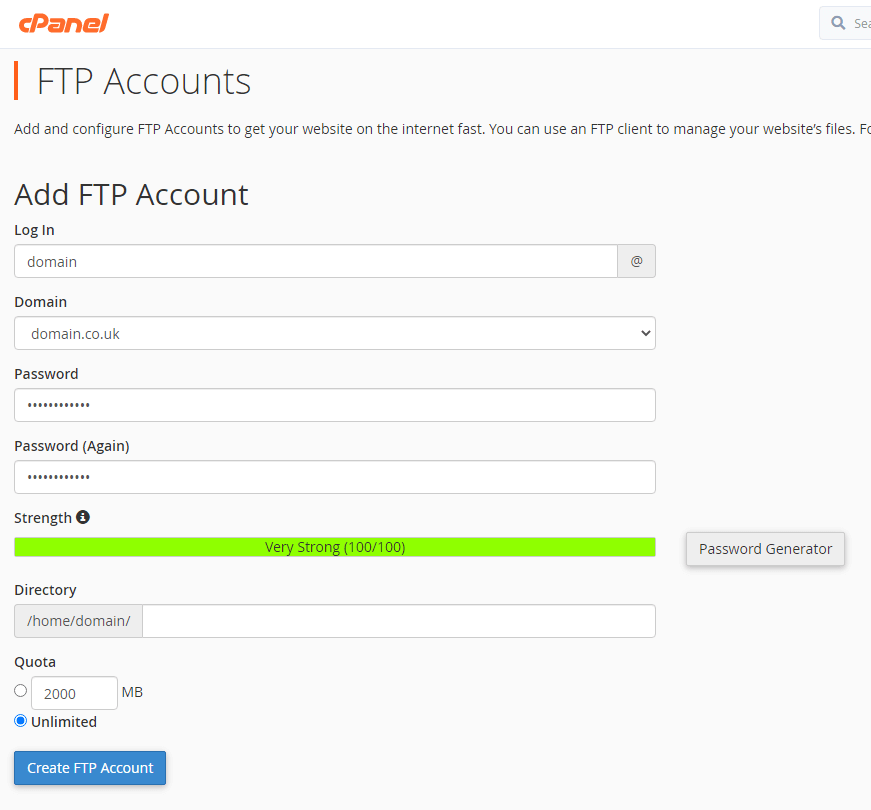
3. Click to create a new account. Enter a username and generate a password. You can leave the directory as default or enter a specific folder path. Set a quota if you want to limit the account’s usage (ideal for restricting developer access).
4. After entering all details, click Create.
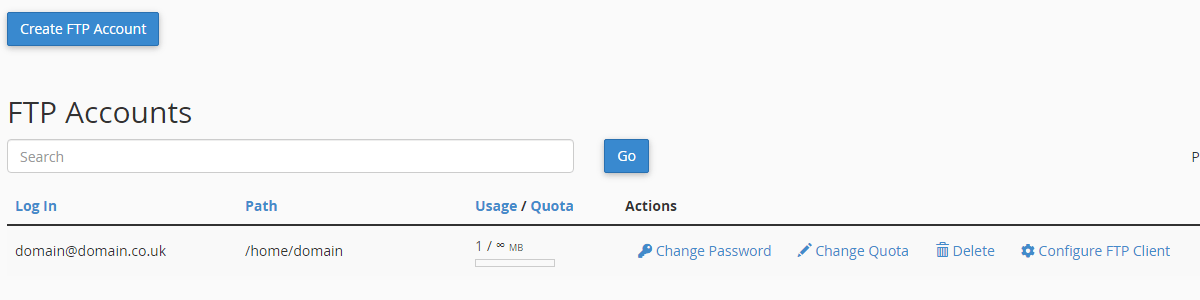
5. From this page, you can manage the account’s information and quotas or delete the account as needed.
Plesk Setup
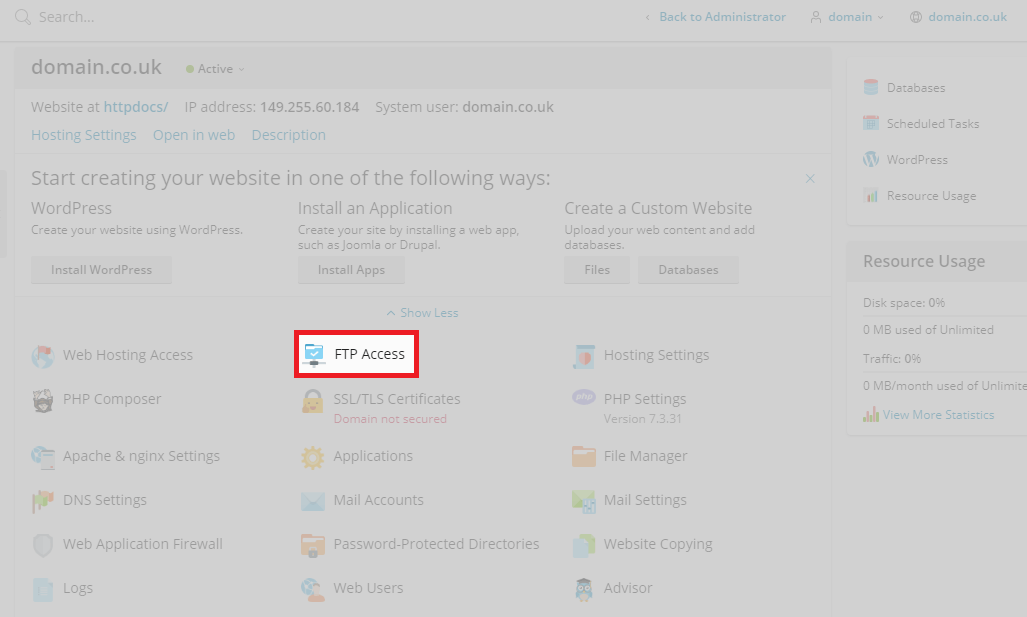
1. Log into your Plesk control panel.
2. Under the domain you want to add an FTP account to, click FTP Access.
3. In the FTP Access area, click Add FTP Account.

4. Enter the account details, such as account name, directory path, and generate a password. Once configured, click OK.
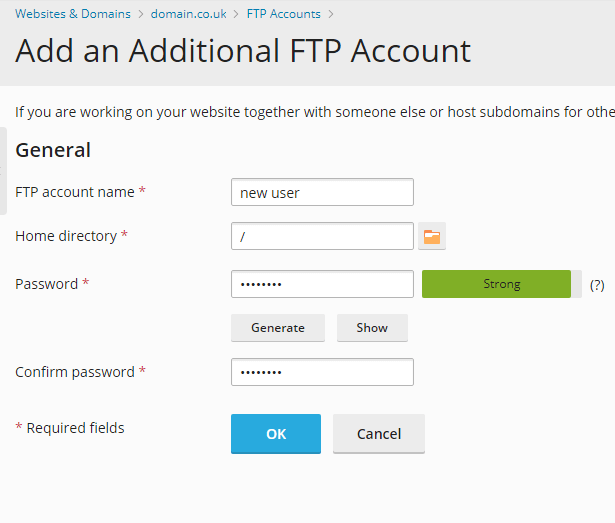
5. If successfully created, a confirmation prompt will appear.
